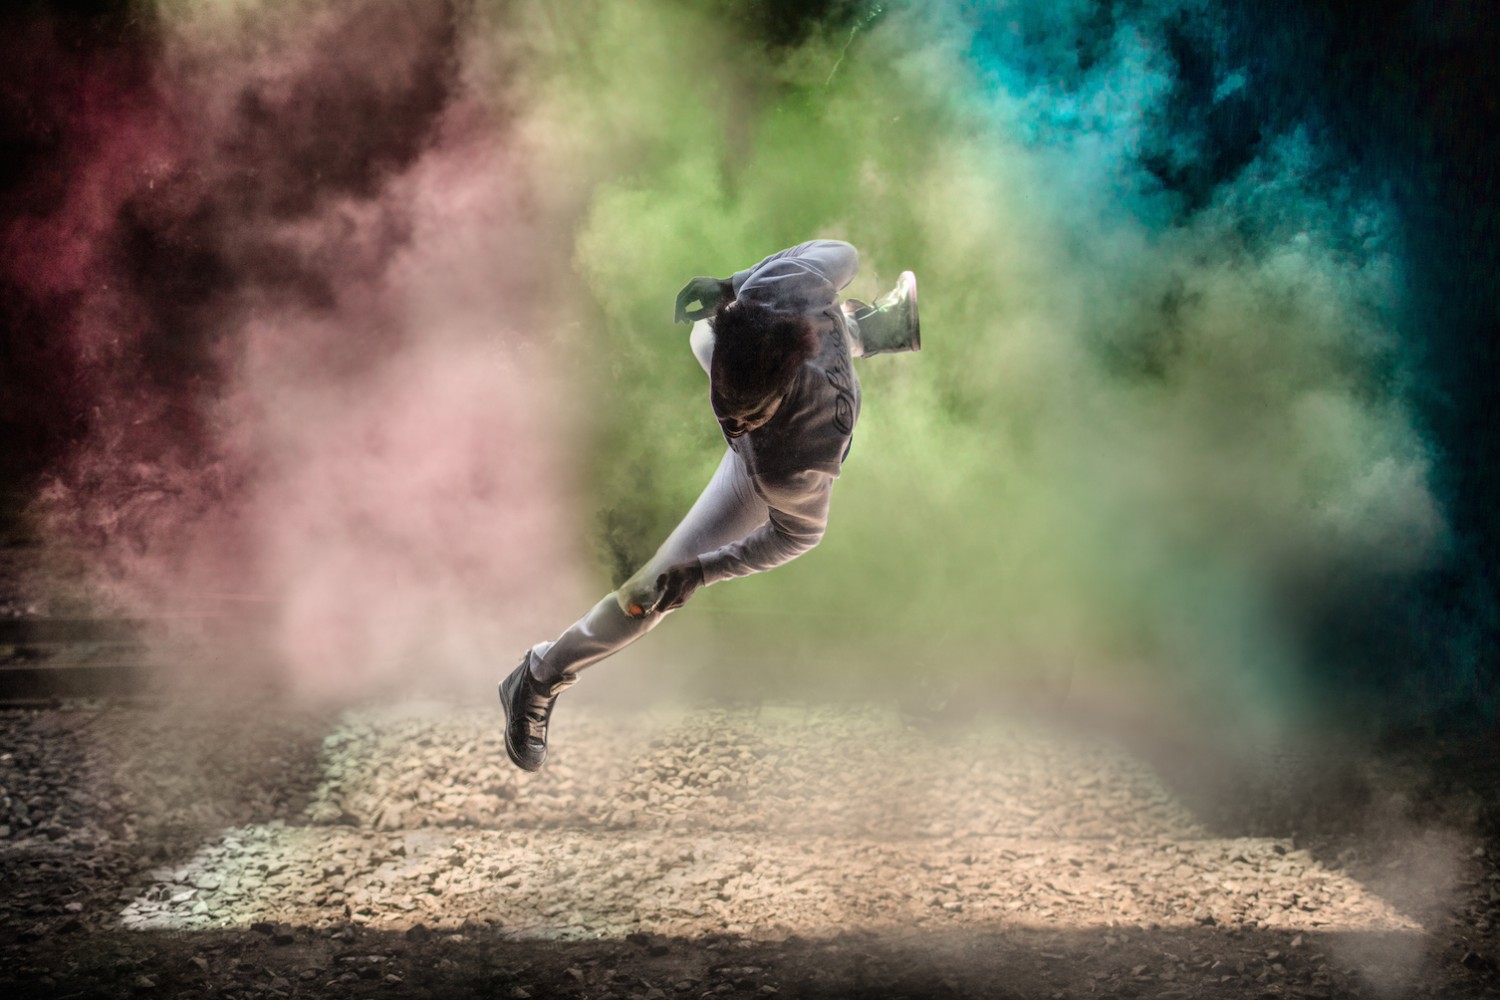
Smoke bomb photography has been a big trend in 2019, and it’s not going away any time soon. Photographers are using smoke to create atmosphere or add a quick pop of color in portrait, landscape, and abstract photography. When used safely, smoke bombs are a fast, easy, and impressive way to elevate your photos.
To add this technique to your repertoire, here’s a quick guide to finding the right smoke bomb, planning the perfect shot, and snapping it safely and efficiently.
Finding the right smoke bombs
First, be aware that there are many different types of smoke bombs. Some come in a can, others in stick or grenade form. Each type and brand will work differently, so look at the features of each before you buy:
Burn time
Some smoke bombs will last longer than others. If you are just getting started, find something that will give you close to a minute of active output for each smoke bomb so that you have time to make adjustments.
Density
The density of the smoke will affect its opacity in your image. Decide ahead of time if you want thin coverage for a mist-like effect or fuller, more opaque coverage.
Activation
Do you need a lighter, or do you just pull a wire? A wire pull is more straightforward to use, but it can add to the price. Just make sure you follow the instructions, no matter which type you choose!
A quick roundup of smoke bomb brands
Best value
Smoke Fountains are a cost-efficient option that come in stick form and give you approximately 45 seconds of burn time per stick. They’re not recommended for hand-holding (like most smoke bombs), but have a lot of colors to choose from, including some color-changing options.
Easiest to use
Peacock Smoke is a great entry-level option. It’s a step above Smoke Fountains in price, but still affordable enough to experiment with. You don’t need a lighter to activate them, and you get up to 90 seconds of effect from one smoke grenade.
Highest quality
Enola Gaye is the choice of many commercial photographers and videographers (just ask Lincoln and Matthew McConaughey). They have an impressive lineup packed with features—and for their high output models, a price tag to match. Buy in bulk to cut down on the price per unit if you feel confident this will be the brand for you.
Budgeting for a smoke bomb photoshoot
If you have everything you’ll need for your smoke bomb photography except for the actual smoke bombs, they are easy to budget for. To get started, use these guidelines.
Plan some test shoots
Use your test to see how long the smoke bombs you like last for, and how many you’ll need to use at a time to get the desired coverage. This will help you make a more educated guess when you buy smoke bombs for a specific shoot later on.
Consider buying in bulk
This can help with shipping and handling costs, and many manufacturers will give you a discount per unit if you buy a certain amount in one order.
Wait for a big sale
Smoke bombs go on sale, just like any other product. So buy when the price is right and store them properly for a longer shelf life. In a cool, dry location, most will last well over a year.
Prepare to spend between $6 and $20 for one smoke bomb. A lower-output, budget option is always good to start with if you are a true beginner, which will give you leeway to move up to the fancier types when you are confident.
Running your smoke bomb photoshoot
In addition to your normal photoshoot routine, you’ll need to take some new things into consideration when adding smoke bombs to the mix.
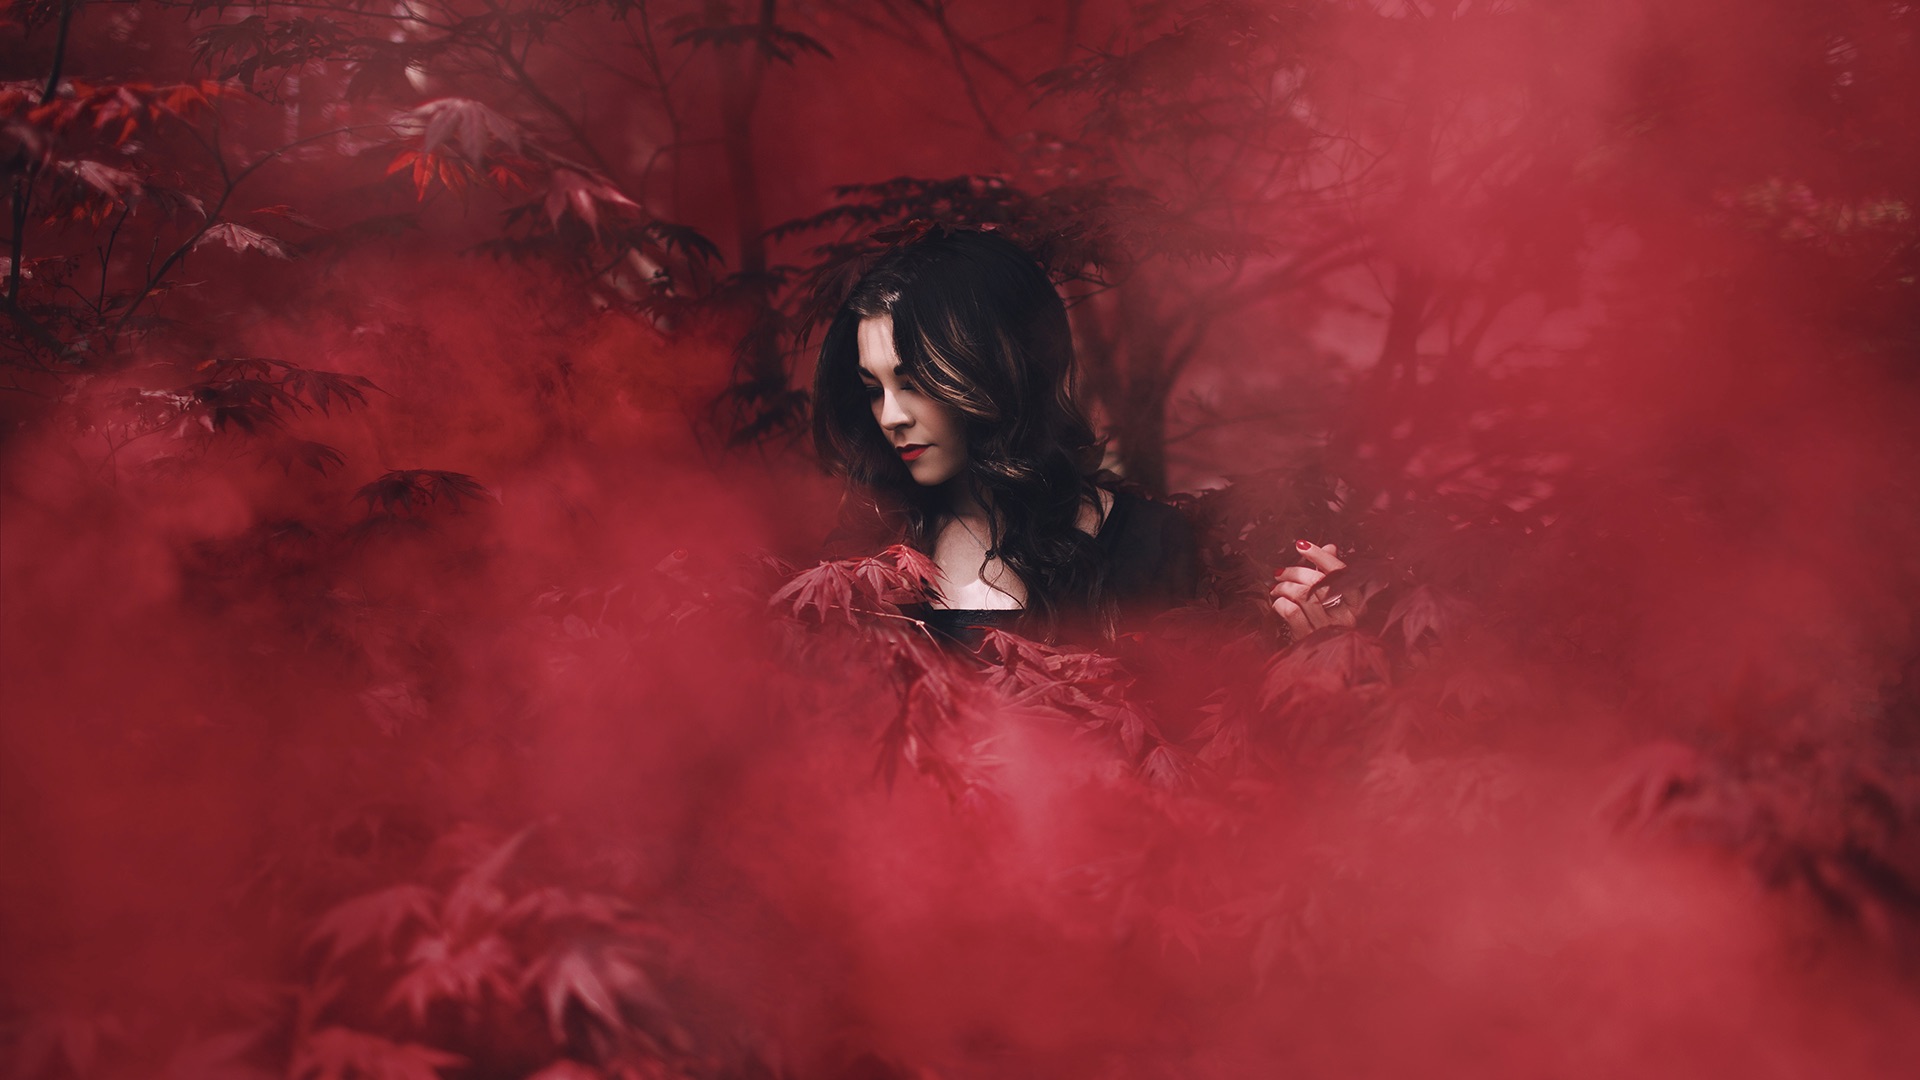
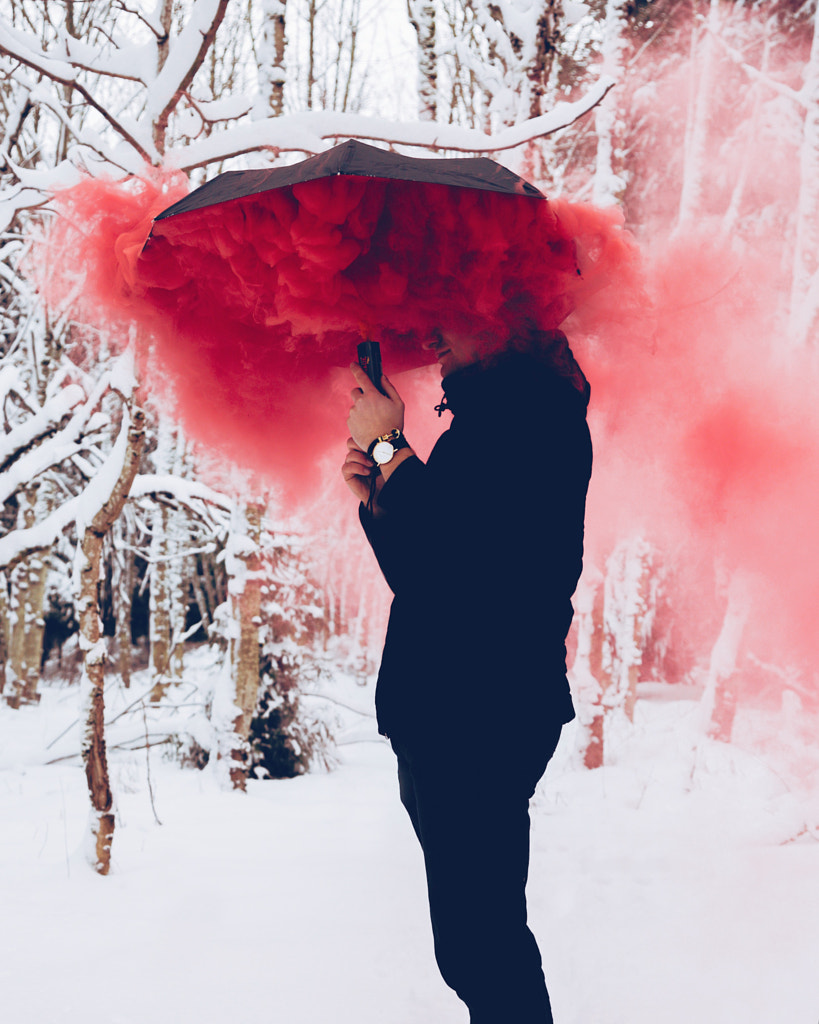
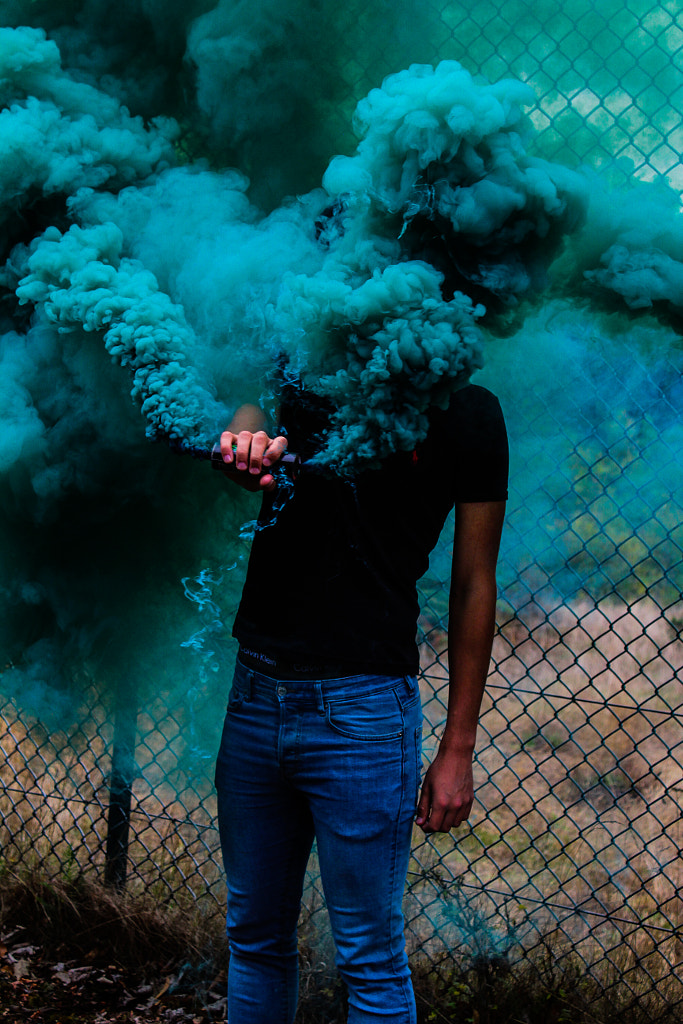
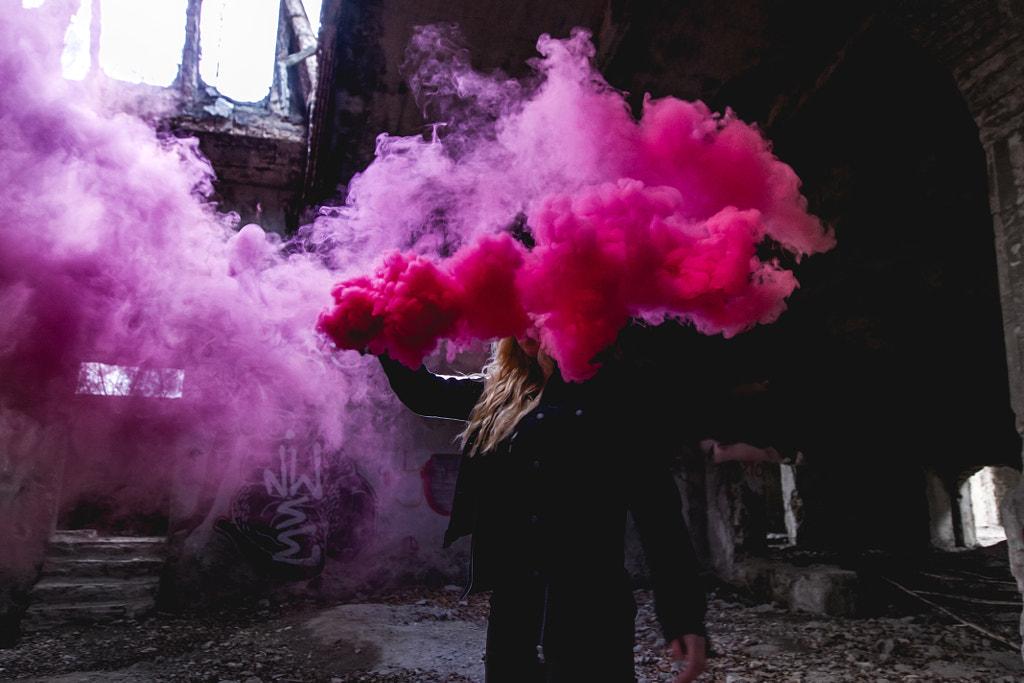
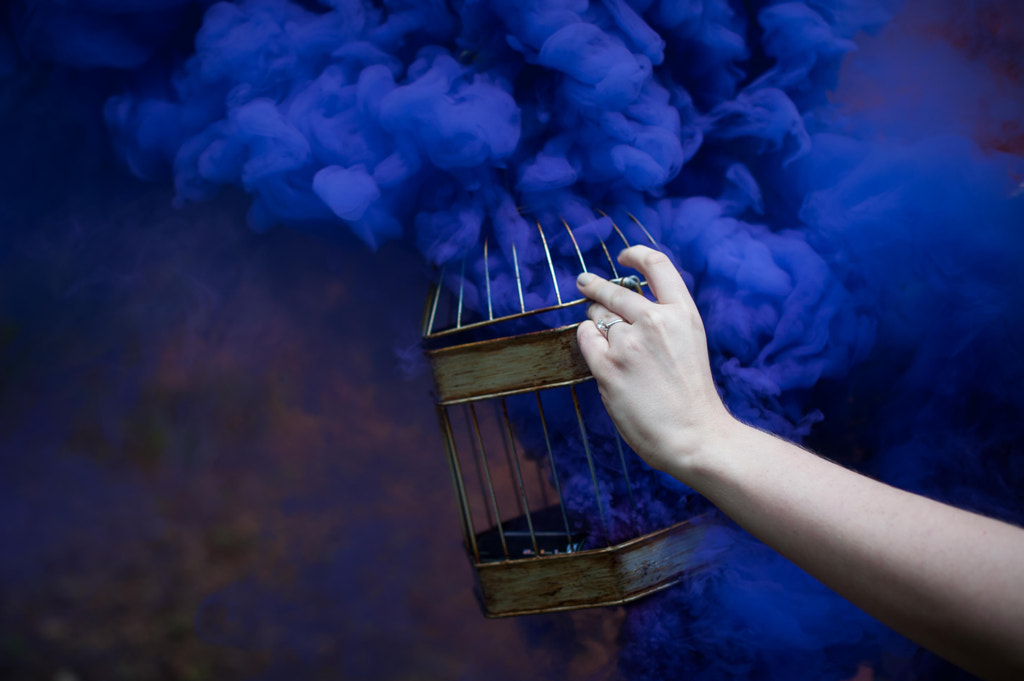
In the planning phase, consider your color choices carefully. A smoke bomb will introduce a high volume of new color into your setting, which you can use to your advantage. Want your smoke to feel out of place and in-your-face? Shoot near its complementary color. Trying for a calmer, more cohesive effect? Seek out analogous color schemes.
Make sure you plan for weather conditions. Wind will dissipate the smoke more rapidly, and you won’t be able to control the effect. If you want your smoke to blow around a bit, bring your own wind in the form of a fan. Even a hand-held, battery-operated version will do, and it shouldn’t cost more than $10-$15.
Once you get started, you’ll need to make the most out of the short amount of active smoke time. Get your metering and composition out of the way as much as possible before you activate the effect.
Don’t forget the lighting! Your smoke will be largely opaque, which means you can really make it pop with a speedlight or a set of strobes. The smoke that is not entirely opaque may give you some interesting light streaks to play around with.
If you choose to hold your smoke bomb during the shoot, move it around slowly to get distinctive trails rather than shaking it in one spot. If you have your model do this, ask him or her to walk across the scene with the smoke bomb before settling into place to get better coverage. You can operate it yourself if you are shooting with a tripod or have a friend or assistant do the fan work.
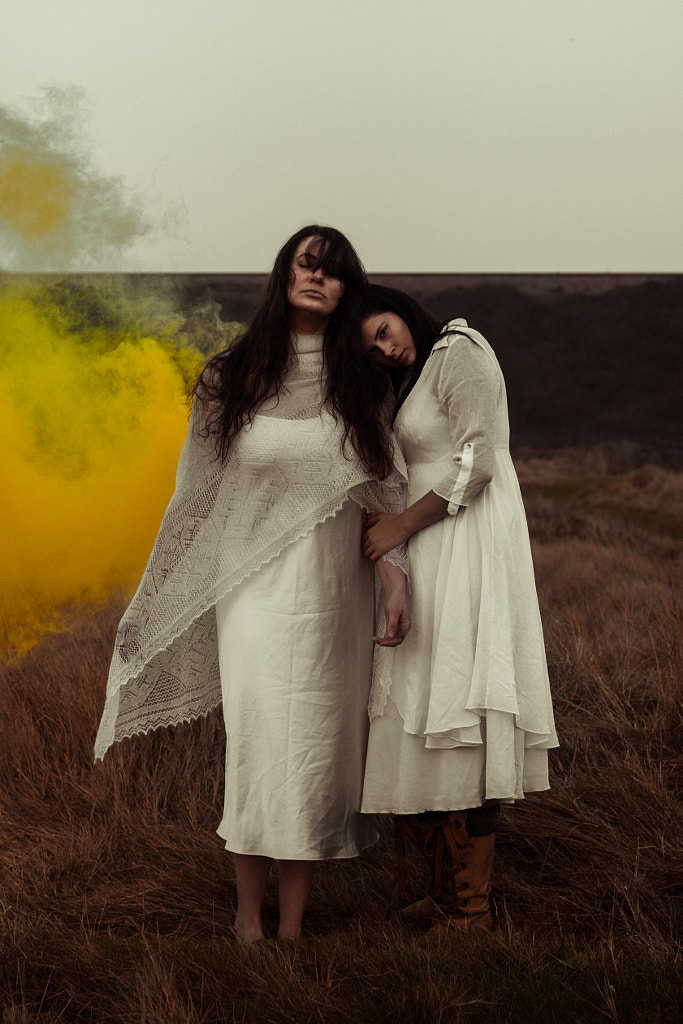
Some smoke bomb photography inspiration
500px is one of the best places to look for smoke bomb photography. When you’re setting up your shoot, look around at the different ways photographers have already used this effect.
Cristian Negroni did a colorful series of friends running with smoke bombs on the beach. THANAT used smoke bombs to add a haze of mystery to a series featuring traditional Thai dress. Armaan Sharma lets the smoke bomb take center stage, photographing it without a model in frame.
To find more inspiration, type “smoke bomb photography” in the search field at the top right of the 500px website.
How to manage the risks of smoke bomb photography
Smoke bombs are essentially pyrotechnics, so treat them with a healthy dose of respect. There are some risks associated with this type of photography, so take safety measures during your shoot.
Prevent fires and explosions with safe use
Store your smoke bombs away from humidity. Moisture can cause malfunctions inside the smoke bomb, which may result in an unexpected explosion. Conversely, don’t plan to use smoke bombs if it’s especially dry out, or if there is a burn ban in your area.
When you’re done with a smoke bomb, dispose of it responsibly. Bring a metal bucket to hold the used smoke bombs until your entire shoot is over. Make sure to douse each one with water as you finish.
Avoid burns
Whatever form you choose to buy, grip your smoke bomb away from the business end. Always point it away from faces and other body parts when igniting. If nothing happens a second or two after lighting it, back away and wait. This could be a sign that moisture has gotten into your smoke bomb, and it may be about to explode.
Just in case, always have a first aid kit with you and make sure you have a way to call for help in the event of an emergency.
Keep from staining clothing and other fabrics
To reduce the risk of staining clothes (and the rest of you), never point a smoke bomb directly at a person. However, even if you take every precaution, there’s a chance that colorful powder will end up on your model’s clothing. Any powder that does remain will be more obvious on a lighter color, so plan a wardrobe that’s on the darker side or use clothing that isn’t a concern to stain.
Stay away from the fumes
The smoke can be irritating if inhaled. Have your model hold his or her breath when stepping directly into the smoke, or compose your photograph so that the model can aim his or her nose and mouth away from the natural flow of the smoke. As the photographer, you might also consider positioning yourself away from the natural flow of the smoke. It’s hard to be creative when you’re coughing.
Don’t cause a panic
Smoke bombs can alarm people who aren’t expecting them, and for good reason. Only use smoke bombs for your photography where it is legal to do so, and always get permission. If there’s a chance someone could happen upon your shoot unexpectedly, warn them beforehand (if you know who it could be), or put up a handmade sign (if you don’t).
Likewise, don’t surprise your model with this technique. Inform him or her beforehand of the risks and the precautions you plan to take.
Smoke bomb photoshoot equipment list
We’ve discussed a lot of things you’ll need for your smoke bomb shoot, so here’s a quick checklist you can refer back to as you plan:
–One or more smoke bombs*
–A lighter, if you are using a type of smoke bomb that does not self-ignite*
–Lighting to make your smoke color pops
–A fan to blow the smoke into position
–A tripod (to keep your camera steady while you move around) or an assistant or friend (to help direct the smoke if you are hand-holding your camera)
–A metal bucket*
–Water*
* These items are absolutely necessary.
Now that you have the knowledge, it’s time to get the tools and plan your shoot. Remember to test different brands as you go to find the smoke bomb that’s right for you. Use the right safety measures, keep an eye on your color theory, and enjoy your brand new photography technique.
Not on 500px yet? Sign up here to explore more impactful photography.
You Might Also Like These Articles:
- Shooting Break Dancers & Smoke Bomb Underground
- Kickass Parkour Action Shots with Smoke Bombs & Fire
- Interview: The Action Photography of Corey Rich
- The 4 Elements in Action Photography Part 1 of 4: Water Sports

Leave a reply